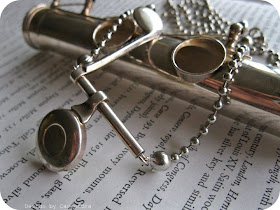
That's how it happens with photography. I've had a lot of practice with lots of sub-level cameras, where my good shots were out of luck. My parents had given me a Canon PowerShot IS 2000 a few years ago for my birthday - it's incredible. (All the shots on this blog thus far have been captured by this camera!) Now that I finally have a camera that is meant to take high-quality pictures for the detail I want, I've taken full advantage of its features. The only issue - creating an ambience for the product itself, with both lighting and setting.
These elements are more crucial - and a lot more difficult - to put together than expected. When I first opened shop on Etsy, my jewelry was photographed against fabrics of my collection of pashmina scarves and patterned clothes. I love those scarves, and I've got great clothes, and I turned on all the lights in the room. I thought it was enough, really. Some of the shots turned out to have a great atmosphere to them, but I would credit that more to luck. Some of them, I found, got lost in the background of the crazy pattern, or the colours didn't come through right. I didn't get it myself - with my own eye, it looked great. Why didn't it come out the way I saw it in the camera's lens? A good example of those shots will be from my first Artbeads.com Design Project with Swarovski materials. Nice idea, poor execution. Really, I just didn't know where I was really going, or what I was really doing.
Strolling around Etsy and a few forums, it seems that the common opinion is that when all else fails, the 'white box' is the best. It brings a true representation to the colours and it's easier to balance out tricky elements like shadow, brightness, sharpness and exposure. It also helps if you have a really good camera, like my PowerShot. Ten mexapixels! It's amazing in macro!
Lemme show you my very simple setup.
The cardboard box was something that had fit an electric vegetable steamer. The cardstock is opaque and stiff, as supposed to regular paper that may not give a true white background and flop over. The carstock piece on the bottom isn't fixed in, and is occasionally replaced with another colour background. (You can see examples of that in the Artbeads.com Pantone Fall 2010 Project, where I had used a page from a French wine calendar, or the Artbeads.com Winter Enchantment Project, using a friend's artwork to complement the presentation.)
 |
| The destash photo shoot! |
The setup you see above is the 'prop setup' for my destash beads to sell on Etsy; using a plain white background for the beads shows their colour at its best and most clear, the small teacup from a Japanese tea set keeps the small and round ones from rolling away, and the ruler to set the bead beside for a measurement of an individual unit, or an idea of length when strung together. This is all set up on a fold-out television tray next to the balcony window for the natural sunlight, the best kind of lighting, if you can help it. I don't really have appropriate lighting to mimic this effect at night, but it's not really the same no matter what you use, really. Here's a few examples of what props and backgrounds I've used inside this white box for product photography.
 |
| Bead Soup Blog Party, Across the Pond necklace - using a Japanese teacup for a 'soup bowl' and a basic white background to focus on the colour of the gemstones. |
 |
| The SHOUT! Collection, Mod Bullseye earrings - A collection inspired by SHOUT! The Mod Musical, using a playbill flyer and a magnet collection. |
I'm hoping I can afford a proper light box soon, I've seen a few in some camera stores that would really make life in product photography a little bit easier. I enjoy the photography process and creating an atmosphere to present my creations, but it doesn't always work out. Trial and error is frustrating, but it makes the process shorter in the long run.
What do you think of the results? What's your favourite DIY method of photography? I would love your feedback!


What a great idea and the results are fantastic! It might help with mine as my photos always tend to look a bit blurred round the edges.
ReplyDeleteEmma